In our previous article, we added a web front end to our reading list program. But this interface only displayed the contents of our database, we still needed to use the command line program to change the data. In this article, we’ll fix that by adding interactivity to our web application. By the end of this article you won’t need the command line program at all.
This will involve two major changes to the web app. Firstly we’ll add actions to deal with adding books to the reading list and starting and finishing books. But if you want to put your reading list on a public web site, you don’t want just anyone to be able to edit it so we’ll also implement a basic level of authorisation and authentication.
As in the previous article, we’ll find that our framework of choice, Dancer, will make this all a lot easier than it would be doing it all from scratch.
How to Read a Book
We’ll start by adding routes to our application allowing us to start and finish reading books. We’ll do this before adding books to the list as this actions are simpler. We’ll implement these actions by adding new route definitions to the BookWeb.pm file. Here’s the definition of the start route.
|
1 2 3 4 5 6 7 8 9 10 11 |
get '/start/:isbn' => sub { my $books_rs = schema->resultset('Book'); my $book = $books_rs->find({ isbn => param('isbn')}); if ($book) { $book->update({started => DateTime->now}); } return redirect '/'; }; |
Like all Dancer routes, this definition consists of an HTTP action (in this case ‘get’) a path and some code to execute when the first two items are matched. The path here is more complex than the path that we saw last time as it contains a parameter. The URL that we want to use to start reading a book looks like http://example.com/start/1930110006. This will flag that you have started reading the book with ISBN 1930110006.
Obviously, that ISBN value will change for different books, so we need a way to capture that parameter and use it in our code. In a Dancer route, you can match parameters with the ‘:name’ syntax that you see in our definition. You can have more than one parameter defined in the route as long as they are named and separated by slashes. You access these parameters using Dancer’s ‘param’ function.
The rest of the code will look familiar to anyone who read the first article in this series (LXF 151) where we wrote the command line version of this program. We get a resultset for our book table, search it for a book with the given ISBN and then update the ‘started’ column in that object to be equal to the current date and time. You might also remember that the DBIx::Class tool that we are using for database access automatically converts between Perl DateTime objects and date/time columns in your database.
Notice that if we don’t find a book with the given ISBN, then we do nothing. It might be worth displaying an error message at that point. Or perhaps, redirecting to the ‘add’ action (which we haven’t written yet).
Once we have updated the book record, we just use Dancer’s ‘redirect’ function to redirect the browser back to the main page of the application. The user will then see the chosen book has moved from the ‘To Read’ list to the ‘Reading’ list.
The code for the ‘end’ route is almost identical. Only the path and the database column will differ. The path will be ‘/end/:isbn’ and we’ll need to update the ‘ended’ column in the database.
Adding New Books
The next thing we need to do is to add new books to the list. Again, we’ll be repurposing code from the original command line program. As we need to go to Amazon for details of the book, we need to create a Net::Amazon object. We’ll need this object in a couple of places, so we’ll write a ‘get_amazon()’ subroutine that creates the object for us.
|
1 2 3 4 5 6 7 8 |
sub get_amazon { return Net::Amazon->new( token => $ENV{AMAZON_KEY}, secret_key => $ENV{AMAZON_SECRET}, associate_tag => $ENV{AMAZON_ASSTAG}, locale => 'uk', ) or die "Cannot connect to Amazon\n"; } |
There’s nothing complicated here. It’s just calling the constructor on the Net::Amazon class and returning the object that is created. Annoyingly, Amazon have changed the way that this works since I wrote the first article in this series. See the boxout “Amazon API Changes” for more details.
We can now define our add route. The path will be a similar format to the start and end routes. The code looks like this:
|
1 2 3 4 5 6 7 8 9 10 11 12 13 14 15 16 17 18 19 20 21 22 23 24 25 26 27 28 29 30 31 |
get '/add/:isbn' => sub { my $author_rs = schema->resultset('Author'); my $amz = get_amazon(); # Search for the book at Amazon my $resp = $amz->search(asin => param('isbn')); unless ($resp->is_success) { die 'Error: ', $resp->message; } my $book = $resp->properties; my $title = $book->ProductName; my $author_name = ($book->authors)[0]; my $imgurl = $book->ImageUrlMedium; # Find or create the author my $author = $author_rs->find_or_create({ name => $author_name, }); # Add the book to the author $author->add_to_books({ isbn => param('isbn'), title => $title, image_url => $imgurl, }); return redirect '/'; }; |
In this function we need to talk to both the database and Amazon, so the first thing we do is to create an author resultset and a Net::Amazon object. We then search Amazon for the ISBN that we have been given. If we find it, we first create an author record (or find the existing one if we already know about this author) and then insert details of the book. Once again, when we have finished, we just need to redirect to the front page and the user will see their new book in the ‘to read’ list.
Adding Links
That’s all very well, but currently the only way to access our new routes is by typing addresses including the ISBNs into the location bar in your browser. That’s hardly user-friendly. Let’s fix that by adding links to the list of books. In the file views/index.tt we have a macro called ‘showbook’ which is responsible for displaying an individual book in the main list. We can edit that and have the links appear for every book. Once the links have been added, the macro looks like this:
|
1 2 3 4 5 6 7 8 9 10 11 12 13 |
<% MACRO showbook(book) BLOCK %> <div class="book"><p><img src="<% book.image_url %>" /> <a href="http://amazon.co.uk/dp/<% book.isbn %>"><% book.title %></a> <br />By <% book.author.name %></p> <p><% IF book.started %>Began reading: <% book.started.strftime('%d %b %Y') %>.<% END %> <% IF book.ended %>Finished reading: <% book.ended.strftime('%d %b %Y') %>.<% END %></p> <% IF book.started AND NOT book.ended -%> <p><a href="/end/<% book.isbn %>">Finish book</a></p> <% ELSIF NOT book.started -%> <p><a href="/start/<% book.isbn %>">Start book</a></p> <% END %> </div> <% END %> |
Our additions are towards the end. If the book has a value in the start date but no value in the end date then it must be in the ‘reading’ list and we display a ‘finish book’ link. If it has no start date then it must be in the ‘to read’ list and we display a ‘start book’ link.
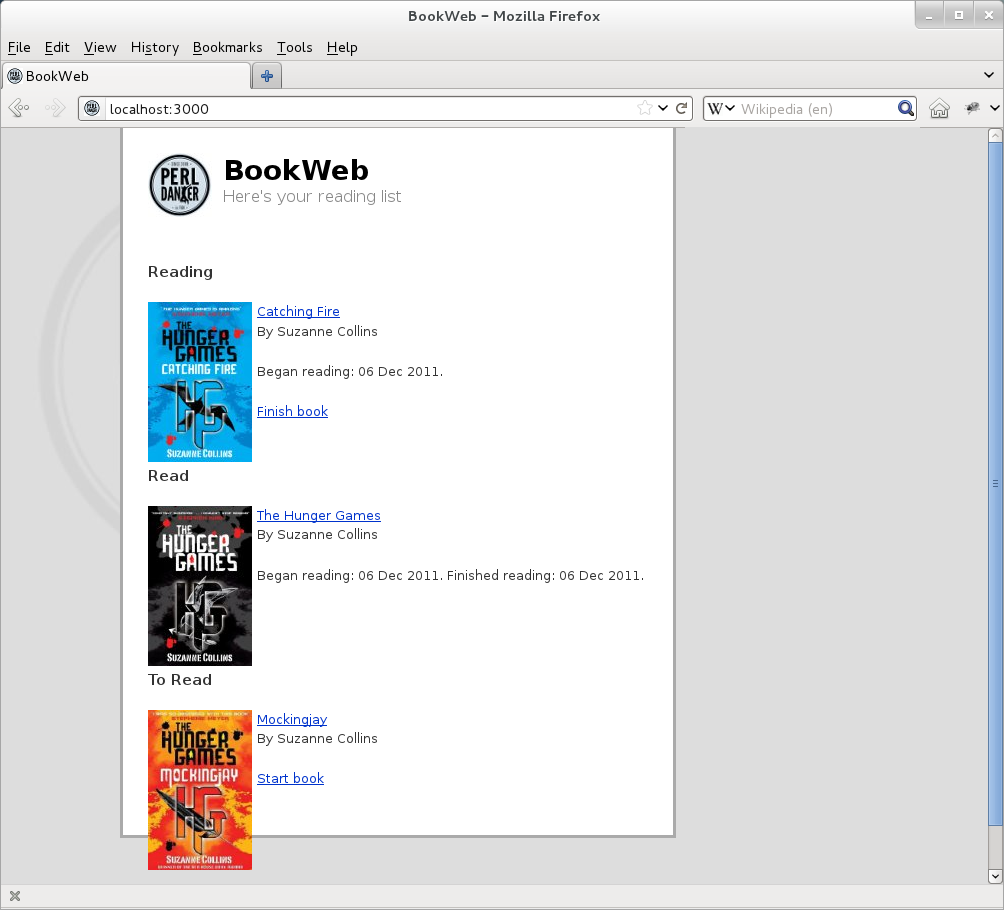
If we make these changes and start our application (with ‘bin/app.pl’), you should see these links appearing next to the books – assuming that you have books on the list. And that brings us neatly to the next problem. We need a better way to add books to the list. Let’s do it by searching Amazon.
Amazon Exploration
The best place for a search box is in a sidebar that appears on every page. Our sidebar is defined in views/layouts/main.tt. Edit the sidebar div so it looks like this:
|
1 2 3 4 |
<div id="sidebar"> <p><form method="POST" action="/search"><p>Search Amazon: <input name="search" values="<% search %>" /> <input type="submit" value="Search" /></form></p> </div> |
That will put a search box on every page in our application. But now we need to write code to carry our the search and display the results. Notice in the form definition we have said that the form sends a POST request to ‘/search’. That gives us a couple of clues as to how our route definition should look.
|
1 2 3 4 5 6 7 8 9 10 11 12 13 14 15 16 17 18 |
post '/search' => sub { my $amz = get_amazon(); my $resp = $amz->search( keyword => param('search'), mode => 'books', ); my %data; $data{search} = param('search'); if ($resp->is_success) { $data{books} = [ $resp->properties ]; } else { $data{error} = $resp->message; } template 'results', \%data; }; |
We need a Net::Amazon object in order to search Amazon, so we get that first. We can then use the same ‘search’ method as we used before, but with different arguments. We tell Amazon that we’re looking for a book and that the keyword we’re looking for is the search term that the user has given us. If the search is successful then the books that match are retrieved by calling the ‘properties’ method on the response object. We put that list in a hash called %data along with the text the we searched for and pass that to the results template.
Which means we need to create a template called views/results.tt. It looks like this:
|
1 2 3 4 5 6 7 8 9 10 11 12 13 14 15 |
<h1>BookWeb - Search Results</h1> <% IF error -%> <p class="error"><% error %> <% ELSE %> <p>You searched for: <b><% search %></b></p> <% IF books.size %> <ul> <% FOREACH book IN books -%> <li><b><% book.title %></b> (<% book.authors.list.0 %>) <a href="/add/<% book.isbn %>">Add to list</a></li> <% END %> </ul> <% ELSE %> <p>Your search returned no results.</p> <% END %> <% END %> |
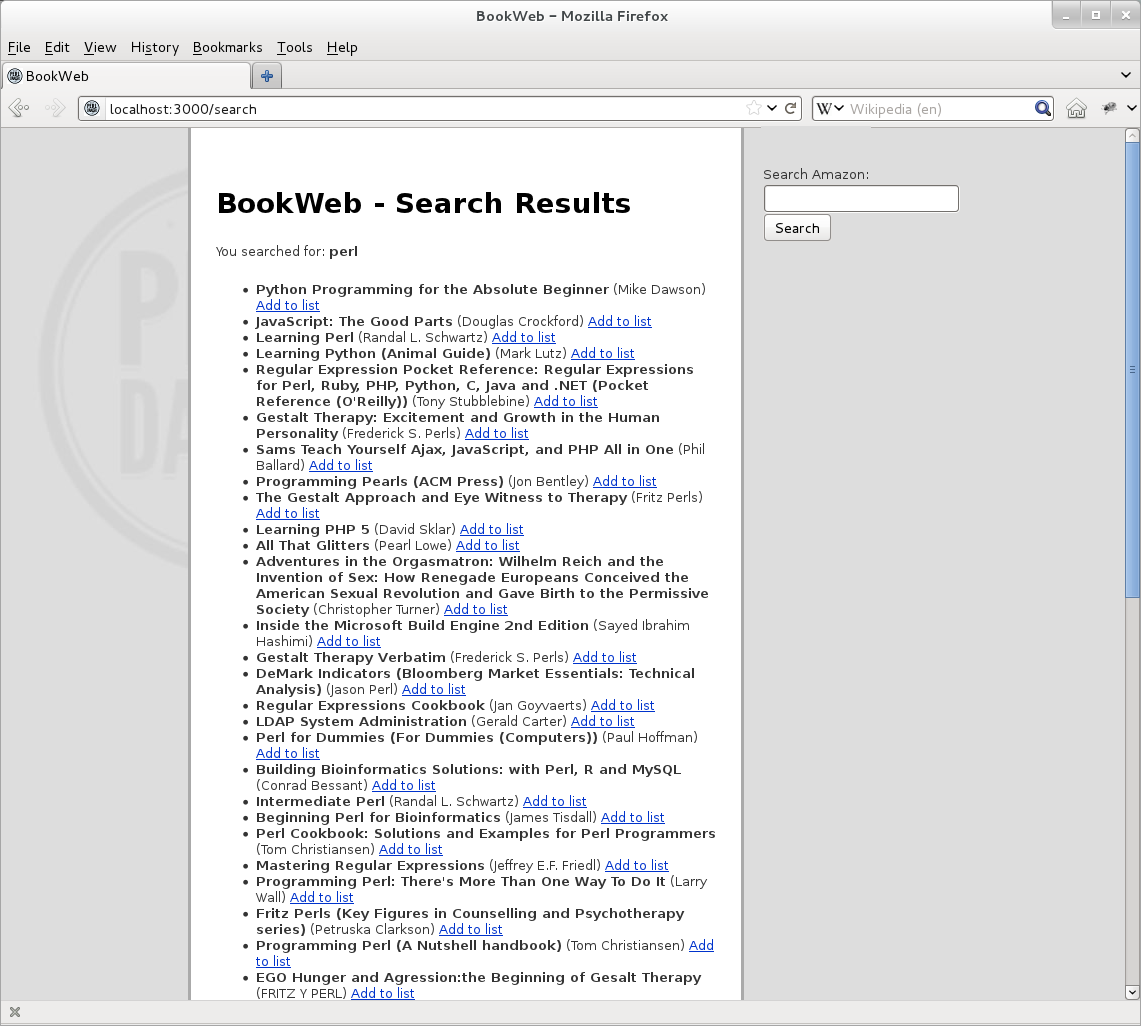
There’s a bit of code there for displaying an error if the search failed and for displaying a “no results” message, but most of the code is used to display a list of books that are returned from Amazon. For each book in the list we display the title, the author and a link to add the book to our reading list.
If you save these changes and restart the application, you should find that you have a fully function web site that now allows you to do anything that our original command line program did. You can add new books to the list and tell the system when you start and finish a book. The only problem is that anyone else can do all of that too.
Adding Security
Presumably you’d like to display your reading list to anyone who is interested, but you’d prefer it if only you can update it. For that we need to introduce some security. We’re going use some really basic authentication, but I hope it will be obvious how to extend it for use in the real world.
We’re going to add the concept of a logged in user. And we’re going to store whether the current user is logged in or logged out using a session cookie. Support for sessions comes as a part of the standard Dancer distribution, but in order to store your session in a cookie, you will need to install the extra Dancer::Session::Cookie module from CPAN. Having installed the module, you need to configure it by adding the following two lines to your config.yml file:
|
1 2 |
session: cookie session_cookie_key: somerandomnonsense |
The value of the cookie key can be any random string. The more random the better. Mine probably isn’t a great example.
In order to add session support we need to add ‘use Dancer::Session’ to the list of modules near the top of BookWeb.pm.
Now we need to think about how our security will work. I’m going to define a list of paths that are public. Anyone can see those pages, but anyone trying to access pages outside of this list will be prompted to log in if they haven’t already.
Dancer has the concept of a ‘before’ hook which is fired before any route is run. That’s a perfect place to check whether the user is allowed to do whatever they are trying to do.
|
1 2 3 4 5 6 7 8 9 |
my %public_path = map { $_ => 1 } ('/', '/login', '/search'); hook before => sub { if (! session('logged_in') and ! $public_path{request->path_info}) { var requested_path => request->path_info; request->path_info('/login'); } }; |
The first line of this code defines a hash called %public_path. The keys of the hash are the public paths and the associated values are all 1. This makes it easy to check whether a path is public or not.
The rest of the code snippet defines the before hook. We check the session to see if the user is logged in and, if they aren’t, whether they are allowed to see the page that they are trying to visit. The path they have requested is given by the current request’s path_info method. We store that original path in a temporary scratch variable called ‘requested_path’ and overwrite the requested path with a request to the login page. Which we now need to write. Logging in is handled with two routes like this:
|
1 2 3 4 5 6 7 8 9 10 11 |
get '/login' => sub { template 'login', { path => vars->{requested_path } }; }; post '/login' => sub { if (params->{user} eq 'reader' && params->{pass} eq 'letmein') { session 'logged_in' => 1; } redirect params->{path} || '/'; }; |
This is a nice illustration of the power of Dancer routes. We have two routes with the same path but with different HTTP request types. If we make a GET request to /login then the first route is triggered. If we make a POST request to the same path then the second route fires. The before hook makes a GET request, so the first route runs. That displays the login template, passing it the original requested path. Here’s that template, which lives in views/login.tt:
|
1 2 3 4 5 6 7 8 9 10 11 |
<div id="header"> <h1>BookWeb</h1> <h2>Login</h2> </div> <p>You need to be logged in to do that</p> <form method="POST" action="/login"> <p>User: <input name="user" /><br /> Password: <input type="password" name="pass" /><br /> <input type="submit" value="Log in" /> <input type="hidden" name="path" value="<% path %>" /> </form> |

That’s all standard stuff. Notice that we’ve stored the original path in a hidden input on the form. The important thing is that the form method is POST, which means that when it is submitted the second login route is triggered. That checks that the username and password are correct and if they are it redirects the user to the path that they originally requested. Of course, in a real application you wouldn’t have the username and password hard-coded into your program.
There’s just one more thing to add. If you can log in to an application then it’s nice to be able to log out. That’s handled with a really simple route.
|
1 2 3 4 5 |
get '/logout' => sub { session 'logged_in' => 0; redirect '/'; }; |
All this does is to set the logged in flag to false and then redirects the user back to the main page. It’s nice to give the user a link to log out so I’ve added the following code to the sidebar in views/layouts/main.tt.
|
1 2 |
<% IF logged %><a href="/logout">Log out</a> <% ELSE %><a href="/login">Log in</a><% END %> |
That has two purposes. If the user is not logged in, then it displays a login link. And when the user is logged in it displays a log out link.
And that is our application complete. If you run the app one last time you’ll see that anyone can see your reading list but that if you try to do anything to change the contents of the list you are asked to log in. There are, of course, many other improvements that can be made to the application. I make some suggestions in the boxout on this page.
I hope you find this application useful. And I hope that you see how the Modern Perl tools that you can find on CPAN make it easy to write really quite complex applications.
More Info: Amazon API Changes
It’s rare for a big company like Amazon to make changes to their web services API in such a way that it breaks a lot of existing code. But, unfortunately, that’s exactly what happened at some point after I wrote the previous article in this series. In the older version of the API you needed a key and a secret. These values were passed to Net::Amazon as you created the object. Amazon have now added a third mandatory parameter which is your Amazon associates ID. Like the other two parameters, you can get this value from your Amazon web services account information.
The Net::Amazon module checks that you have given it all of the mandatory parameters when you call its constructor method. Older versions of this module checked for the key and the secret. But once the API change was introduced those parameters weren’t enough and any API calls were failing with an error about the missing parameter. Version 0.61 of Net::Amazon adds the associates ID to the list of mandatory parameters that the constructor requires. The new version of the call is shown in the code in this article. I recommend that you update your version of Net::Amazon to avoid any potential problems.
More Info: Deploying your application
Throughout the last couple of articles, we’ve been using Dancer’s built-in test web server to run our web application. But if you find the app to be useful you’ll eventually want to deploy it on a real, public web server. How simple is that?
It’s actually very simple. And there are a number of different options available. Dancer is built on top of Perl technology called “PSGI” which is a protocol that defines the interactions between a web application and the web hosting environment where the application runs. The beauty of this approach is that if you have a PSGI-compatible application then it’s simple enough to deploy it in any PSGI-ready web hosting environment. And as any Dancer application is already PSGI compatible, you can deploy it just about anywhere.
Details of some common deployment scenarios are in the Dancer::Deployment manual page which comes as part of the standard Dancer distribution. Just enter “perldoc Dancer::Deployment” at your command line to read it. For more details of PSGI (and Plack which is a reference implementation of the specification) see the project’s web site at http://plackperl.org/.
More Info: Further Suggestions
Over the course of these three articles, we have created the skeleton of a useful little application. But there are a number of improvements that can be made. Here are a few suggestions.
- The HTML and CSS I’ve used have been very basic. They can be improved to make the application look more attractive.
- Currently we show the maintenance links to everyone and only authenticate when someone tries to use them. An alternative approach would be to only display the links if the user is logged in.
- Currently all of the list maintenance actions are full requests to the server. It would be possible to rewrite them to use AJAX so that the user experience is smoother.
- The database contains all the data required to create a web feed of your current reading matter. Perhaps a route at ‘/feed’ which displayed an Atom feed of all books that have been started or finished in the last 24 hours.
- It would be possible to add to the ‘/start’ and ‘/end’ actions so that they tell Twitter what they are doing. “Dave has just started reading …” or something like that.
- If you moved the username and password information into the database then it wouldn’t be too hard to make it into a multi-user system.
If you implement any of these suggestions, or come up with any other improvements I’d be very interested to hear about them.
